CrystalGleam Glassware
CNCTOPBAOS High Precision 3D Edge Finder 0.001mm NO,Waterproof CNC Machining Center Trigger Touch Probe,Milling Machine Automatic Find Center Position Locator,XYZ Coordinate Tool Setter Measuring+Tip
CNCTOPBAOS High Precision 3D Edge Finder 0.001mm NO,Waterproof CNC Machining Center Trigger Touch Probe,Milling Machine Automatic Find Center Position Locator,XYZ Coordinate Tool Setter Measuring+Tip
Regular price
$147.00 USD
Regular price
$147.00 USD
Sale price
$147.00 USD
Shipping calculated at checkout.
Quantity
Couldn't load pickup availability
Product description

Package included:
- 1x 3D Edge Finder
- 1x Ruby probe tip
- 1x Connecting Cable
- 1x Wrench
- PDF. user manual


Debugging the concentricity
Steps:
- Install the dial gauge on the spindle of the machine tool, ensuring that its measuring head can touch the outer surface of the measuring head of the edge finder;
- Adjust the position of the dial gauge so that its measuring head is perpendicular to the outer surface of the edge finder measuring head;
- Install the edge finder on the machine spindle and ensure that it is securely installed;
- Manually rotate the spindle of the machine tool (at low speed) and observe the changes in the reading of the dial gauge;
- Based on the reading of the dial gauge, determine the direction that needs to be adjusted;
- If the dial gauge reading is too large in a certain direction, it indicates that the edge finder is off center in that direction;
- Use a wrench or screwdriver to fine tune the corresponding position of the screw, gradually reducing the deviation;
- After each adjustment, rotate the spindle again and observe the dial gauge reading until the concentricity of the measuring needle ball head is less than 0.005mm;
- After adjusting the concentricity to the correct range, tighten all adjustment screws to ensure that the position of the edge finder is fixed.

- Turn off the power of the machine tool and ensure that the equipment is in a power-off state,
- Clean the installation interface and measuring head of the edge finder to ensure that there is no dust, oil stains, or impurities
- Align the probe tip with the installation interface of the edge finder, ensuring that the positioning pin or keyway of the probe is aligned with the interface, gently insert the probe, and ensure that it is installed in place
- During the tightening process, use the provided wrench to clamp the needle seat to avoid damaging the internal structure.

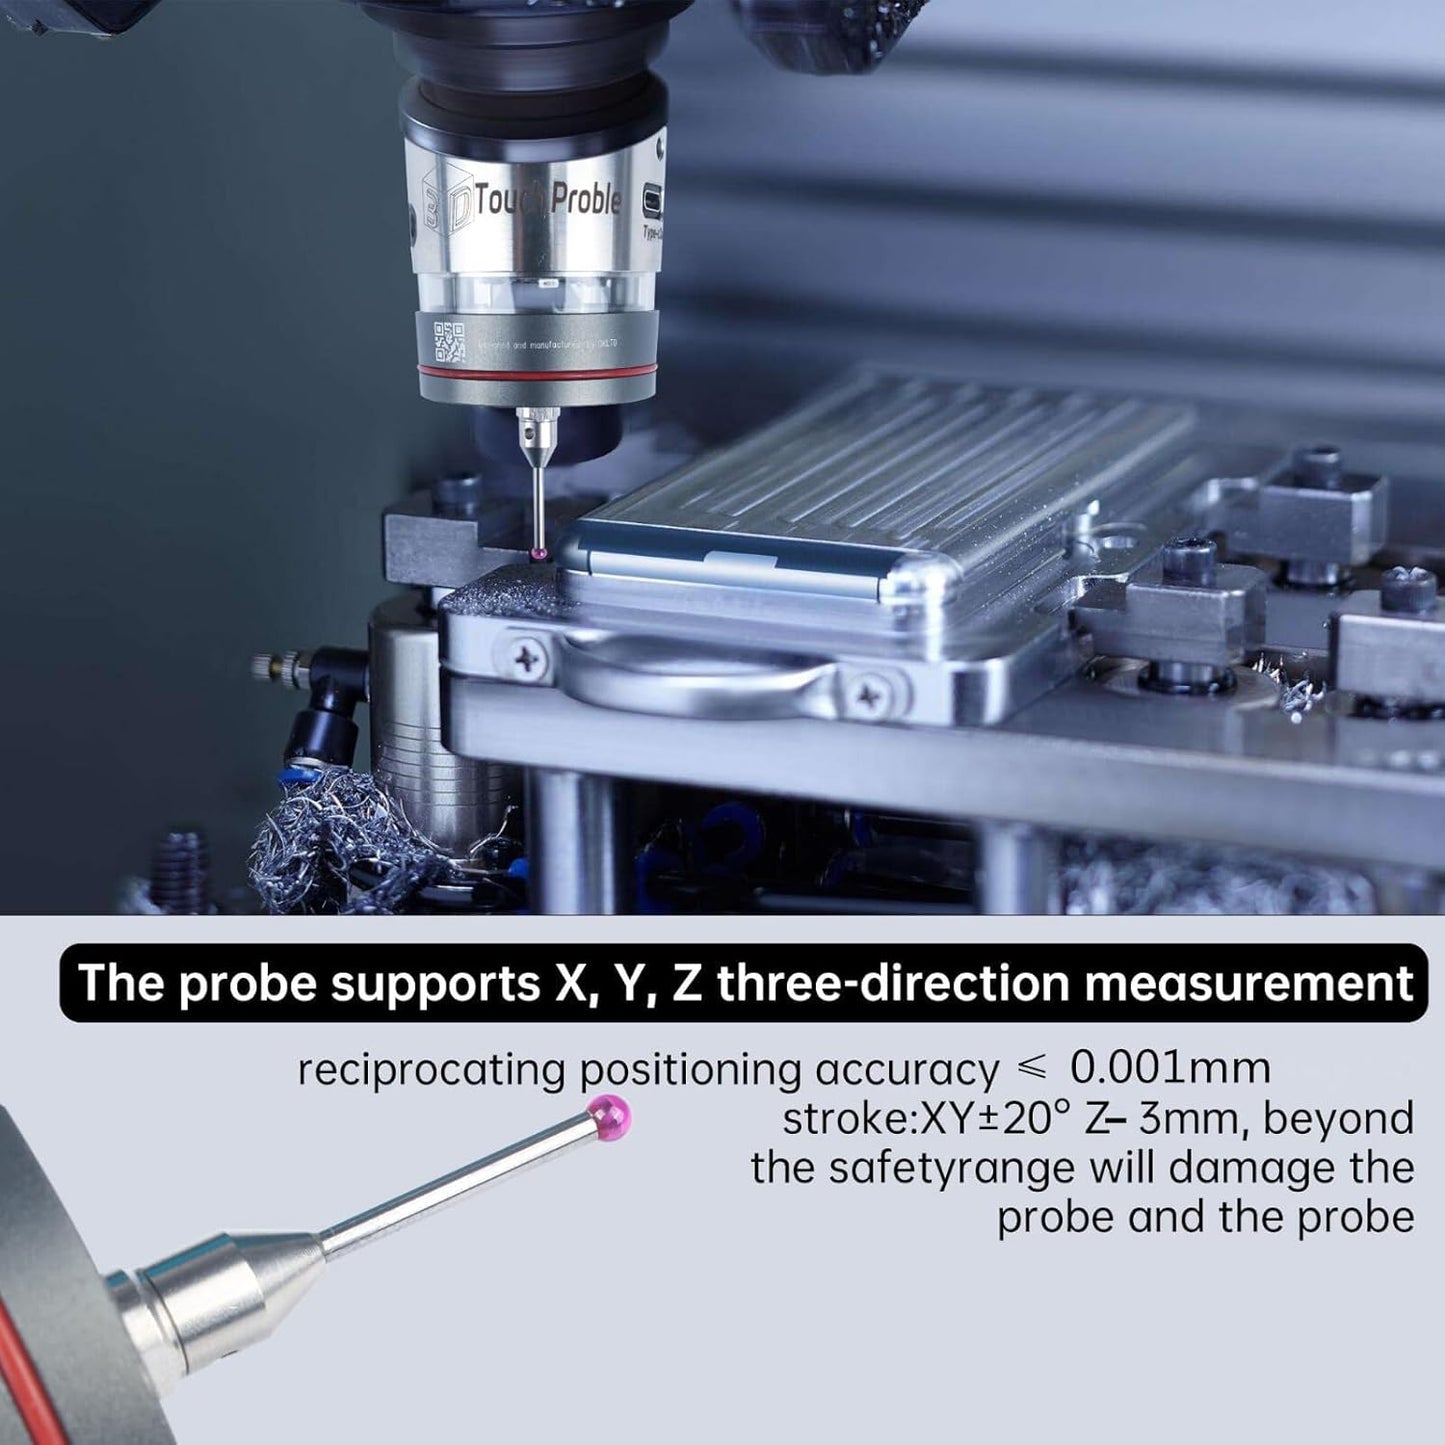
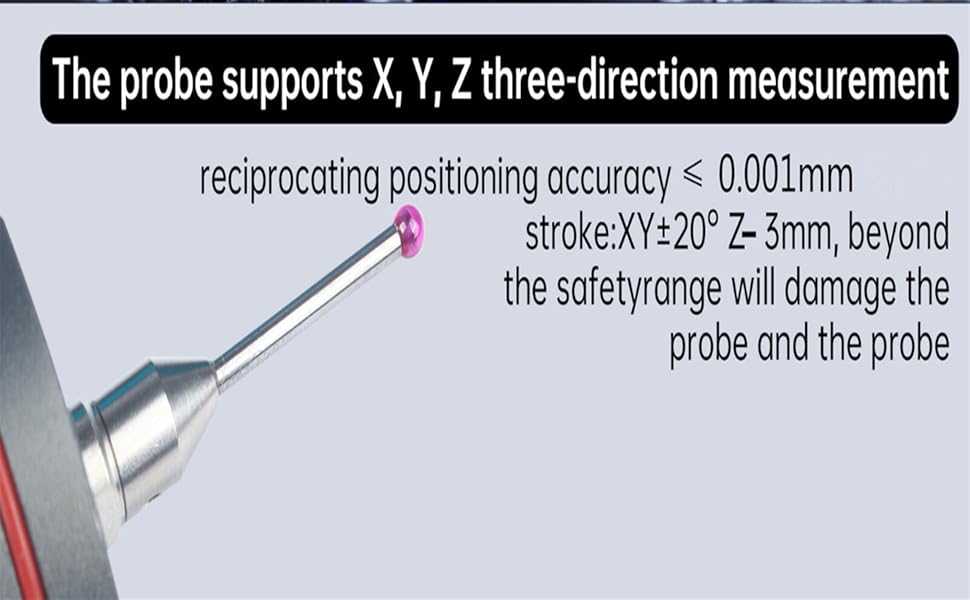
0.001mm Repeatability Accuracy
- The repeatability accuracy reaches 0.001mm, which can more accurately locate the edges and feature points of the workpiece;
- Ensuring more precise tool alignment and positioning during the machining process, thereby improving overall machining accuracy and reducing errors;
- High precision edge finders can quickly and accurately complete tool alignment and positioning, reducing manual adjustment time and errors, thereby improving production efficiency, reducing scrap rates, saving material costs;
- Adapting to complex workpieces, and improving automation levels.

- The WP-500 wired probe adopts an E-type quick plug interface with a locking mechanism to ensure a stable connection and avoid looseness or detachment caused by vibration or movement.
- It has a shielding layer that can effectively reduce electromagnetic interference and ensure the stability of signal transmission.
- It is easy to plug and unplug and is equipped with a 3m long 2-core output signal cable.

Calculate deviation value
- Contact the measuring head with the two edges of the workpiece and record the coordinate values X1 and X2 respectively.
- Due to the diameter of the measuring head (ball head diameter), the actual edge position of the workpiece needs to be compensated by subtracting the radius of the measuring head
- The length of the workpiece is known and is used to verify the accuracy of the measurement results
- Calculation steps:
- Calculate the distance between two measurement points: X2−X1
- Subtract the actual length of the workpiece and the diameter of the measuring head to obtain the deviation value, divide by 2 to obtain the deviation value on one side